Getting Started with PyTorch Image Classification on Google Colab
This beginner-friendly PyTorch image classification tutorial shows how to train and test a model on Google Colab using the CIFAR-10 dataset.
You will learn step-by-step how to:
- Set up Google Colab with GPU for deep learning
- Train a ResNet18 model on CIFAR-10
- Upload and test your own images with the trained model
By the end, you’ll have a working PyTorch image classifier in Colab, complete with code examples.
Part 1: How to Use Google Colab from Scratch
What is Google Colab? (Beginner Introduction)
Google Colab is a free cloud-based Jupyter notebook with GPU/TPU support. It’s widely used for machine learning because it eliminates the need to install PyTorch locally and provides free GPU acceleration.
Steps to Get Started:
- Go to: https://colab.research.google.com
- Sign in with your Google account.
- Click
File > New Notebook. - To enable GPU:
Edit > Notebook settings > Hardware Accelerator > GPU - Run a test:
import torch
torch.cuda.is_available()  # Should return True if GPU is enabled
Part 2: PyTorch CIFAR-10 Image Classification Code on Google Colab
Below is the end-to-end PyTorch pipeline for CIFAR-10 classification: dataset loading, model training, evaluation, and predictions.
1. Import required libraries
import torch
import torchvision
import torchvision.transforms as transforms
import torch.nn as nn
import torch.optim as optim
import torchvision.models as models
import matplotlib.pyplot as plt
import numpy as np
2. Define image preprocessing pipeline
# Convert image to tensor and normalize to [-1, 1]
transform = transforms.Compose([
    transforms.ToTensor(),
    transforms.Normalize((0.5, 0.5, 0.5), (0.5, 0.5, 0.5)) #(mean, std) for RGB channels
])
3. Load CIFAR-10 dataset (automatically downloads if not present)
# CIFAR-10 has 50,000 training images and 10,000 test images of size 32x32
trainset = torchvision.datasets.CIFAR10(root='./data', train=True,
                                        download=True, transform=transform)
trainloader = torch.utils.data.DataLoader(trainset, batch_size=4,
                                          shuffle=True, num_workers=2)

testset = torchvision.datasets.CIFAR10(root='./data', train=False,
                                       download=True, transform=transform)
testloader = torch.utils.data.DataLoader(testset, batch_size=4,
                                         shuffle=False, num_workers=2)

# Define class labels
classes = ('plane', 'car', 'bird', 'cat', 'deer', 'dog',
	'frog', 'horse', 'ship', 'truck')
Where is the training dataset from?
The dataset used in this tutorial is CIFAR-10, one of the most popular image classification benchmarks in deep learning. It comes pre-integrated with PyTorch’s torchvision.datasets, and when running on Google Colab, it will be automatically downloaded and cached.
torchvision.datasets.CIFAR10(root='./data', train=True,
	download=True, transform=transform)
It contains:
- 50,000 training images
- 10,000 test images
- 10 classes (airplane, car, bird, etc.)
4. Initialize the ResNet18 model and modify the final layer for 10-class classification
net = models.resnet18(pretrained=False)
net.fc = nn.Linear(net.fc.in_features, 10)  # Replace the final fully connected layer

# Move model to GPU if available
device = torch.device("cuda" if torch.cuda.is_available() else "cpu")
net.to(device)
5. Define loss function and optimizer
criterion = nn.CrossEntropyLoss()
optimizer = optim.SGD(net.parameters(), lr=0.001, momentum=0.9)
6. Train the model for 2 epochs
for epoch in range(2):  # You can increase this number for better accuracy
    running_loss = 0.0
    for i, data in enumerate(trainloader, 0):
        inputs, labels = data[0].to(device), data[1].to(device)

        # Forward pass + backward pass + optimization
        optimizer.zero_grad()
        outputs = net(inputs)
        loss = criterion(outputs, labels)
        loss.backward()
        optimizer.step()

        # Print loss every 2000 mini-batches
        running_loss += loss.item()
        if i % 2000 == 1999:
            print(f'[Epoch {epoch + 1}, Batch {i + 1}] loss: {running_loss / 2000:.3f}')
            running_loss = 0.0

print('Finished Training')
7. Evaluate the model on test data
correct = 0
total = 0
with torch.no_grad():  # Disable gradient computation for evaluation
    for data in testloader:
        images, labels = data[0].to(device), data[1].to(device)
        outputs = net(images)
        _, predicted = torch.max(outputs.data, 1)  # Get the index of the max log-probability
        total += labels.size(0)
        correct += (predicted == labels).sum().item()

print(f'Accuracy on test images: {100 * correct / total:.2f}%')
8. Display a batch of test images along with ground truth and predicted labels
def imshow(img):
    img = img / 2 + 0.5  # Unnormalize the image
    npimg = img.numpy()
    plt.imshow(np.transpose(npimg, (1, 2, 0)))  # Convert from CHW to HWC
    plt.axis('off')
    plt.show()

# Get one batch of test data
dataiter = iter(testloader)
images, labels = next(dataiter)

# Show the images
imshow(torchvision.utils.make_grid(images))
print('GroundTruth: ', ' '.join(f'{classes[labels[j]]}' for j in range(4)))

# Make predictions
outputs = net(images.to(device))
_, predicted = torch.max(outputs, 1)
print('Predicted: ', ' '.join(f'{classes[predicted[j]]}' for j in range(4)))
Part 3: Upload and Classify Your Own Image
1. Upload Your Own Image to Google Colab
This step demonstrates how to test the trained PyTorch model with your own images. Uploading custom data ensures the classifier works beyond CIFAR-10 test images.
from google.colab import files
uploaded = files.upload()
2. Preprocess and Predict
from PIL import Image
img = Image.open('your_image.png').convert('RGB')
transform = transforms.Compose([
    transforms.Resize((32, 32)),
    transforms.ToTensor(),
    transforms.Normalize((0.5, 0.5, 0.5), (0.5, 0.5, 0.5))
])
input_tensor = transform(img).unsqueeze(0).to(device)

net.eval()
output = net(input_tensor)
_, predicted = torch.max(output, 1)
print("Prediction:", classes[predicted.item()])
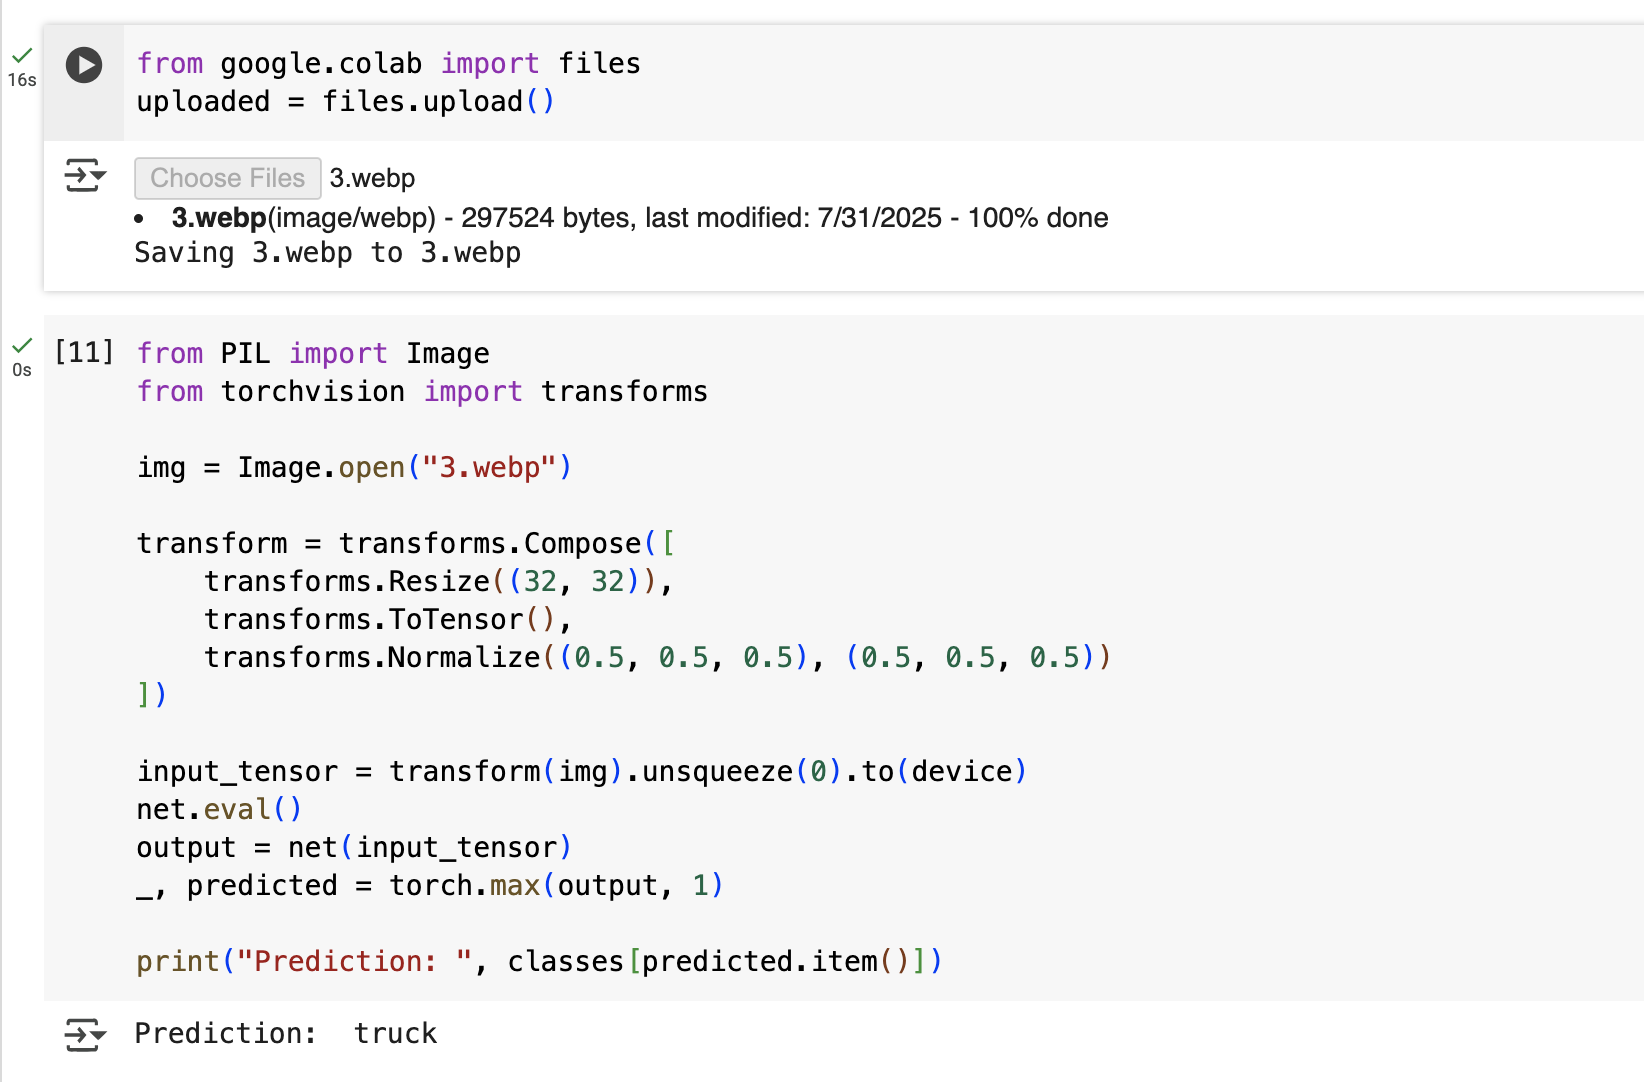
3. Sample Output from Colab
The following figure shows the actual output after successfully uploading an image in Google Colab and running the model inference code.

FAQ
Q: Why use Google Colab for PyTorch?
A: Google Colab provides free GPU acceleration, collaborative notebooks, and zero installation. It’s perfect for beginners learning PyTorch.
Q: What dataset is used in this tutorial?
A: We use CIFAR-10, a standard benchmark with 60,000 images across 10 categories (e.g., airplane, car, cat, dog).
Q: Can I replace ResNet18 with another model?
A: Yes. You can replace models.resnet18 with other models such as ResNet50, VGG16, or MobileNet, depending on your accuracy vs performance needs.